Getting Started
Head over to GitHub releases to download the latest version, extract and add
addons/ folder to your project's main folder.Enable it on project's Plugins settings and RmlUi is installed!
To start using it, add a RMLDocument to your scene, it's a Control-based node, so feel free to adjust it's dimensions.
To make it show something, you need a
.rml file and attach a script to load the file. Here's a sample document file:
<rml>
<head>
	<style>
		body {
			display: flex;
			flex-direction: column;
			align-items: center;
			justify-content: center;
			gap: 4px;
		}
	</style>
</head>
<body>
	<h1>Hello!</h1>
	<button>Test Button</button>
	<svg src="icon.svg"/>
	<input type="text"/>
</body>
</rml>
And a script of courtesy:
extends RMLDocument

func _ready() -> void:
	load_from_path("res://test.rml")
Attaching
res://test.gd to the RMLDocument node and running the scene should show something like this: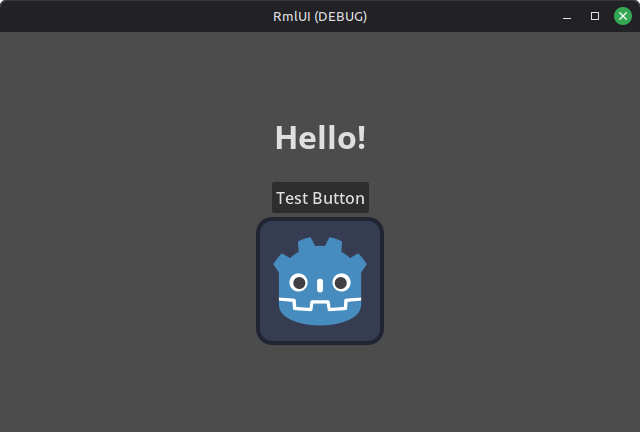
RmlUi API
This GDExtension was created with RmlUi, some of it's API is translated to GDExtension, like querying elements, setting attributes, properties, classes, etc.
Some of it's features are incompatible with this GDExtension, like for example:
- Data binding (model-view-controller), as it doesn't have support of adding data binding on runtime (RmlUi expects data bindings before even loading an document);
- Lua, as for scripting is recommended to use GDScript instead.